Showing posts with label Refrigerator repair. Show all posts

Friday, August 3, 2012

Charging 134a Freon On Residential Refrigerators.

Charging 134a freon  on residential  refrigerators.

If you own a refrigerator built after 1995 chances are it uses 134a coolant. Here at On-Time Appliance we use the large 30# cans but this is not piratical for the average person who owns a refrigerator.  I have found though 134a is 134a the only difference is the "Stop Leak" additive they add to the can. I have never tried this so I do not know if it works in refrigerators. It might end up restricting your sealed system. For the bold ones who have tried, leave a comment and I will update this article.
134a is suppose to be the Environmentally friendly coolant. It is more than the older R12 but it is still freon so be careful. Those of us with the E.P. A. License have to recover and be accountable for the freon we recover and use. This is an expense  added to the bill which unfortunately in many cases the owner disposes of the refrigerator (adding to the land fills). With this article I hope to show it is fairly easy to add coolant with out all the extra equipment and still have a reliable refrigerator.

After you  checked all other possibilities  and determined that your refrigerator has a coolant leak ( I say coolant because freon is a brand name like Kleenex is to tissue)


Supco Piercing Valve


You must first Tap the process tube on your compressor. The best way is to solder a valve onto the process tube of the compressor. But they have a non soldier piercing valve that works very well. Simply follow the enclosed instructions. The only tip I would give would be to tighten the screws until they are very firm to prevent leaks.
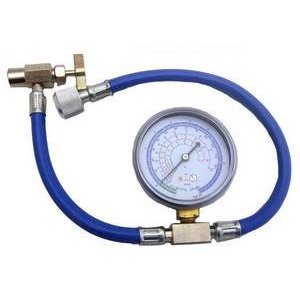


Enviro-Safe R12/R22 Can Tap with Gauge - R-134a Can to R-12/R-22 Port


Now that you have your compressor taped your ready to check and to recharge your system. Screw the hose onto the piercing valve and and open it. (Follow the enclosed instructions that came with the valve.) Make sure your gauge is turned off. If your not sure which way that is it will become obvious to you when you open the piercing valve. If you here gas escaping just turn the gauge's valve the other way.


Notice the " 0 " Scale on the gauge, to the right is green ( negative or in a vacuum ) to the left is black. Disregard the Blue graphs they are not needed here. We want to see 3-5 lbs. If you are low on freon it will be negative. If the gauge is 10 or above your compressor is defective or you have a restriction in your sealed system. If that is the case you must call a Appliance Repair Company to repair your refrigerator.

OK your gauge shows negative so lets put some coolant in. 

  1. Attach your hose to your can of coolant and pierce the can. Now you need to blow the air from your gauges. If you bought the gauges shown here the small amount air that will enter your system should not pose a problem. If your using longer hoses do not skip this next step.
  2. Close off the piercing valve installed on the compressor and loosen the hose connected to it. Open the can of coolant. Now slightly open the valve on your gauge until you hear gas escaping the loosen hose by the piercing valve, quickly tighten the hose and turn the valve off at your gauge.
  3. Open the piercing valve. Now your ready to recharge your system with 134a. Hold the can upright (most blended coolants need to charge with the can upside down, in its liquid state. This requires a different charging method.) and open the valve on your gauge. Let the coolant flow for about 10 seconds then turn off the valve at the gauge, check you pressure. Remember we are looking for 3-5 lbs. You will have to do this multiple times. Increase or decrease the amount of time you have your gauge valve open to tweak the pressure into place.
 After 10 -15 min check and adjust the pressure if needed. Tighten the piercing valve on the compressor and remove the charging hose.
Lat time I checked the prices to do this job was $34.00 if you buy everything you need from Amazon. You still have a leak in your system so every so often you might need to put a little more coolant in depending on the size of your leak. I have seen refrigerators last several years before another recharge is needed.
If you find the coolant leaks out quickly, check to be sure your piercing valve is good and tight. You might have to use some "Stop Leak". But that's for another Article.
 Leave your questions and comment below. We answer them all. Thanks from On-Time appliance.


Tuesday, July 31, 2012

Cleaning your refrigerator's condenser coils


Cleaning your Refrigerator's condenser coils


This should be done at least twice a year. This is often forgotten about but is the leading cause for your refrigerator / freezer to perform poorly. Given time it will cause damage to your compressor. Here at Appliance Repair Carrollton TX. We find the major cause of compressor replacement is because of not cleaning your condenser.
Locate the refrigerator / freezer condenser by removing the front kick plate. A few models actually screw this in place but normally they are held in place with tabs. Pull the cover off, sometimes you have to be a little forceful. And look to see if the coils are there. 9 out of 10 times that is were it will be located. If they are not there you must pull the refrigerator out from the wall to gain access to the back. Take Care. You might want to place some thing down in front of your refrigerator so you won't scratch your floor. Also be aware of the water line going to your refrigerator (If you have a ice maker). The old copper water lines become brittle and crack over time, make sure this is checked for leaks before you push the refrigerator back into place. At the bottom of the refrigerator you will see a cover (usually cardboard but they may use plastic or metal) remove this to gain access to the condenser.

Showed here are the most common types of condenser's you will see on today's refrigerators. They may look different depending on the make and model but you will see the coils. Use your vacuum to clean as much of the dust as you can. The picture shown on the left is very deep and a brush must be used to get to the rear of the coils. If you dodn't have a "Coil Cleaning Brush" just use a rag attach to a thin rod to do the deep cleaning.
That is all there is to it. Give your refrigerator 24hrs to adjust the cooling, then check your temperature.
If you would like to have On-Time Appliance in the Dallas and Plano area perform this task. Just follow the link or call us at (214)916-0337


Sunday, July 29, 2012

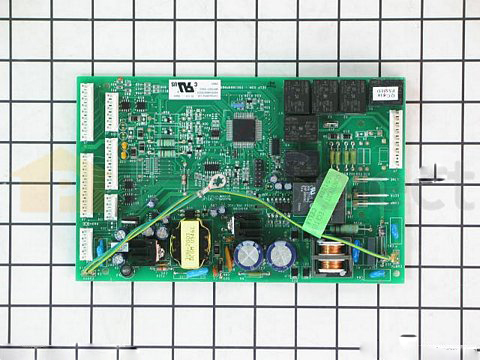
Ge Refrigerator Main Board

                   Ge Refrigerator Main Control Board              

This part fixes the following symptoms:
  • Will not start
  • Freezer section too warm
  • Fridge section too warm
  • Unusual Noise
  • Water dispenser will not dispense water
  • Ice maker will not make ice
  • Fridge section too cold
  • Refrigerator runs too long
  • Freeze To Cold
    This control board is located in the back of the refrigerator. And is very easy to change. You should see the asscess panel. Simply unscrew the plate and you will have access to the control board.
    Fix your Board.Com is about 1/2 price on repair of  your board.
    If you need a company in the Dallas or Plano Texas area. Give us a call at (214)916-0337 or go to On-Time Appliance on-line scheduling available.

    This control board may be found in models similar to the following:

                        Ge Refrigerators: BSS25JFRJWW BSY25GFMCC BSY25GFMWW CSS25USWASS CSS25USWCSS GBS20HBSAWW GBS20HBSBWW GBS20HBSCWW GDL20KCSABS GDS20KCSABB      GDS20KCSAWW GSH25JFTWW GSH25KGRWW GSL25IFRJBS GSL25JFPBS GSS22JFMCC GSS22JFMWW GSS22KGPWW GSS25JFMCC GSS25JFPCC GSS25JFPWW GSS25KGPWW GSS25KGTBB GSS25KGTWW GSS25LGPBB GSS25LGPWW GSS25LGTWW GSS25LSPBS GSS25LSTSS GSS25LSWASS GSS25LSWCSS GSS25QGTAWW GSS25QGTBBB GSS25QGTBWW GSS25QSTSS GSS25SGPSS GSS25SGRSS GTS22IBMARWW PFS22MISBBB PFS22SISASS PFS22SISBSS PFS22SISCSS PFS22SISDSS PSI23NGPBB PSI23SCPBS PSI23SGRSV PSS25MGNCC PSS25MGNWW PSS26LGRBB PSS26LGRWW PSS26LSRSS PSS26MGPWW PSS26MGSBB PSS26MGSWW PSS26MSTSS PSS26NGPWW PSS26SGPSS PSS26SGRSS PSS27SHNBS


Unclogging Your Refrigerator Drain


Unclogging your refrigerators drain.


Are you having water dripping from your refrigerator onto your floor? 

This is a very common problem for refrigerators. First make sure water is not leaking from your Ice Maker. 
If not you have a clogged defrost drain line.
What happens (see above) your Condensation Collection tray under your evaperator coils fills with ice and covers the Drain Hole. When this happens the water from the defrost cycle has no were to go but into your refrigerator and onto the floor. This is why you have water pooling a few times a day and not a steady flow.

How to repair this:

The ways described here works for all makes and models of residential refrigerator. If you have a Top or Bottom mount freezer, Side by Side, or French door style. They all work the same way only the position of the drain hole will be different. It is always behind  the back wall of the freezer.

If you have the time to properly defrost your refrigerator this is the best and easiest way. Simply unplug your refrigerator, open the doors, and give it a proper 12 hour defrost. you might want to place a towel in front just in case your drip pan over fills, but this is uncommon.

If the above way will not work for you then you can manually defrost and unclog your drain line.
On the inside of your freezer locate the screws in the back of your freezer holding the back panel in place. Remove these screws then remove your back panel exposing the evaporator coils. No matter what type of refrigerator you have is should look similar to the above picture.
 I like to boil a cup of water in the microwave untill it boils. Pour the hot water in the Condensation collection tray. Use a towel to soak up the water after it has cooled. Repeat this process untill there is no ice.
NOTE: Do not pour the hot water over the evaporator coils directly. Just in the collection tray.
If you have a small air line you can blow into the drain hole to be sure in is completely defrosted. Pour a cap full or two of bleach into the drain hole to help prevent the growth of mold in your drain pan. Reassemble plug your refrigerator back in and you should be set to go.If you still need some help and your in the Dallas or Plano Texas area. Give us a call at www.on-timeapplianceplano.com   (214) 926-0337